Manage invites
Inviting others to join your workspace in ThenNext is a great way to collaborate with team members, colleagues, or friends on projects and tasks. By sharing a unique invite link or code, you can easily add new members to your workspace without needing to search for their contact information or wait for them to create an account. Effective management of invites helps you control who has access to your workspaces, ensuring that sensitive information remains secure and that only authorized individuals can contribute to your projects. In this article, we’ll walk you through the process of creating, accepting, and managing invites in ThenNext.
Creating an Invite
To create and manage invites you need to go the workspace settings.
To create an invite, follow these steps:
- Go to the settings page of your workspace.
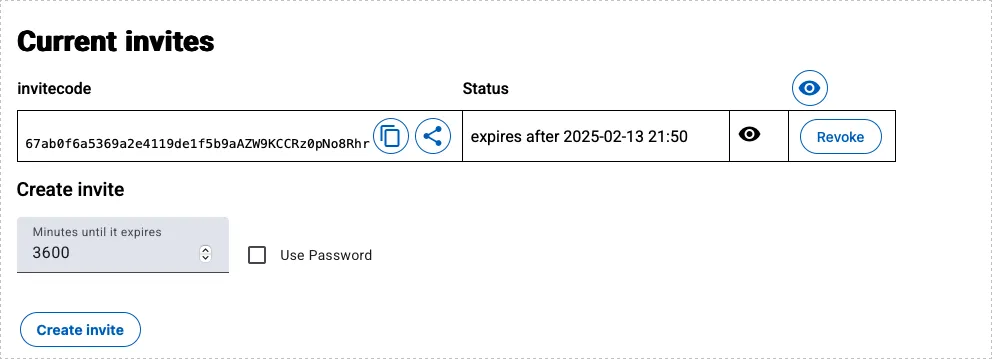
- Go to the Current Invites and enter the following details:
- Minutes until an invite expires
- (Optionally) Set a password
- Click on
Create Inviteto create a new invite (we don’t store the password, so write that down first)
When you create an invite, you will receive a unique code that can be shared as a link with others. This link can be sent via email, chat, or messaging app, allowing others to join your workspace without needing to search for their account or asking that they first create an account.
In the list of current invites you can click on “copy code” or “copy link”.
Invite Statuses
Invites can have one of the following statuses:
- Active: The invite is active and can be consumed by someone.
- Revoked: The invite has been revoked by an user and cannot be used.
- Expired: The invite has expired due to the set expiration time and cannot be used.
- Consumed: The invite has been used by someone and cannot be used again.
Accepting an Invite
Each member can only accept an invite once. When someone accepts an invite, they will be added to your workspace, and the invite will change its status to “consumed”.
To accept an invite go to https://app.thennext.com/invite (or use the invite link) and enter the code. You don’t need to enter the code if the code was provided in the link. In addition you can enter a password. You can then preview the invite.
After previewing the invite the user can accept the invite. If the invite is still valid, they will be redirected to the workspace.
Revoking Invites
You can revoke invites at any time from the settings page of your workspace. Revoked invites cannot be used by others.
By managing invites effectively, you can easily collaborate with others on your projects and tasks while maintaining control over who has access to your workspaces.